


 |
 |
 |
/// Rotate, Guide and Slide
Many of our clients will be using Custom In Ear Monitors (IEMs) for the first time so we thought it best to put together this quick guide on how to correctly insert and remove them. Custom IEMs unlike universal IEMs cannot simply be pushed straight into your ear canal, this will cause your ear canal to become irritated and or inflammed causing discomfort, Your IEMs will then feel uncomfortable until this irritation and or inflammation receeds, this could be a few hours or even days depending on how many times you've put them in incorrectly!
Our key phrase here if you take nothing else from this page is "Rotate, Guide and Slide" but read on...
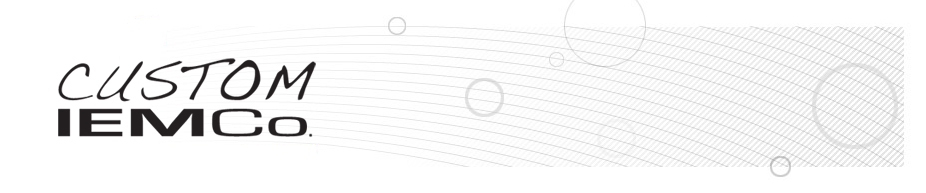
/// Step 1 - Rotate
So in step 1 (pictured below) you'll see that the IEM is being held at the top and bottom but that it's also rotated forward about 45 degrees (with the cable behind you). This is a great place to start although you may find that a little more rotation could be better for you...
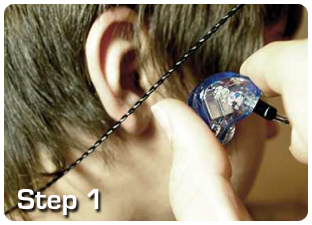
/// Step 2 - Guide
In step 2 (pictured below) you'll see that the IEM canal tip has now been inserted into the ear canal opening whilst still maintaining that forward rotation.
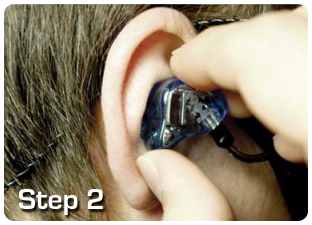
/// Step 3 - Rotate, Guide & Slide
In step 3 (pictured below) you'll see that the IEM has now been rotated backwards, during this gentle (not forced) rotation you'll want to guide and slide the IEM canal tip into your ear canal with a little inward motion.
/// Step 4
In step 4 (pictured below) you'll see that the IEM has naturally found it's right location, at this stage you can give it a gentle press until the IEM is 100% seated correctly, it's comfortable and you have the maximum seal. You may find that opening and closing your mouth a few times will help also.
/// Removing your Custom IEMs
Never pull or use the cable in any way to remove your Custom IEMs, this will ultimately damage the cable, the cable housing and or cause the IEM to be removed incorrectly. Removing your IEMs should work from step 3 in reverse to step 1. So, you'll gentle pull the IEM out slightly whilst holding the top and bottom, then you'll rotate them forward whilst guiding and sliding the canal tip outwards.
 |
 |
 |
 |